- Home
- Toolkit
Toolkit
Observe and Document
Summary
In this session, we identify the neighbourhood we will focus on for the duration of the project.
Equipment
Several large sheets of paper (1 sheet/group), pens, blackboard, chalk, several large printed maps of local area (1 map/group), bluetak, computers/tablets if available
Preparation
- Desktop research into the local neighbourhoods and maps available.
- Prepare google map of the area.
1. Introduce the project. What are the aims and outputs of the project overall? – 10 Minutes
2. Define the borders of the neighbourhood – what area will you focus on? What are the landmarks? What makes this area different from other areas? – 10 Minutes
3. Each group has a large paper base-map of the area. Each group can annotate their map, showing landmarks, important activities, where they live, what they know about the area. Are the boundaries correct? If not how should they be? Are there different areas within the neighbourhood? If so what are they and why? – 30 Minutes
4. (optional) In Google, make a new ‘my maps’ map for the project (if you have access to digital resources). This will be used throughout the project to build an online database of information that can be shared within the class, and potentially externally once the project is finished. Identify the boundaries and other information on the google map. – 30 Minutes
Summary
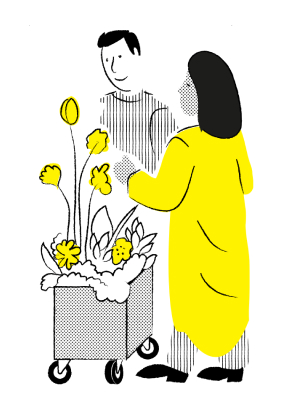
In this session, we identify the communities that live and work in the neighbourhood. Who will we be engaging with?
Equipment
Several large sheets of paper (1 sheet/group), pens, blackboard, chalk, 1x A3sheet/student and pens, computers/tablets if available.
Preparation
1. Define the word ‘community’. Give examples. – 10 minutes
2. Which community groups can you think of that live or work in your area? Desktop research if available and brainstorming. – 15 minutes
3. What particular activities do these communities or groups carry out? For whom? Why? Can you see them or are they hidden? – 10 minutes
4. In groups, discuss the neighbourhood and inhabitants activities found there. Use the large sheets of paper to brainstorm – make a mind map diagram. – 10 minutes
5. Each group presents their findings to the class. – 15 minutes
Summary
In this session, we prepare to go into the neighbourhood, making sure we have organised everything we need.
Equipment
A4 sheets of paper and pens, cameras (at least 1/ group), example concept diagrams printed, blank sheets of paper for concept diagrams.
Preparation
• Source cameras, make sure they work/have power/have memory cards if digital or film if not.
• Prepare base maps for the clipboards to be used during the following session.
• You can prepare a presentation explaining what a walkabout is, using images.
1. Introduce walking as a way to explore the neighbourhood, to gather a ‘sense of place’, in advance of the following session. – 10 minutes
2. Discuss the walkabout aims: what do you want to observe? What interests you? – 10 minutes
3. Prepare information about the neighbourhood and documentation methods.
• Write down your criteria for observation
• Give examples of what these might be, allowing the children to come up with their own directions of inquiry. – 5 minutes
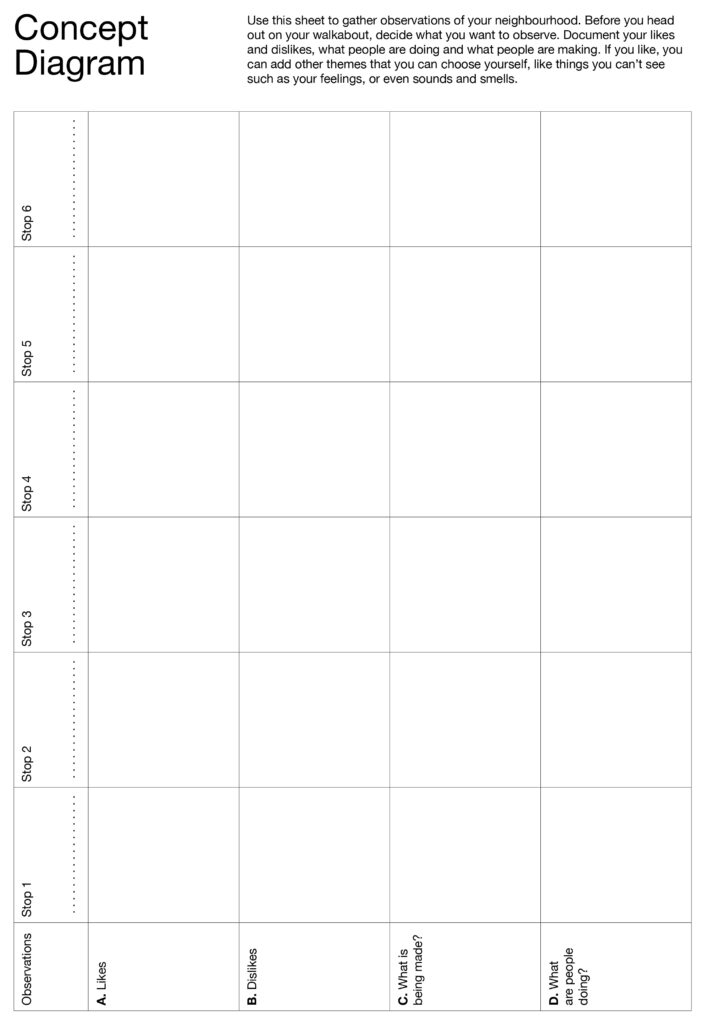
4. Create a concept diagram: See ‘How to’ illustration opposite. – 10 minutes
• Demonstrate making a concept diagram: and show how it is used. Then facilitate the making of the group concept diagrams for use during the walkabout in the following session.
5. Each group presents their (empty) concept diagrams to the rest of the class. – 10 minutes
6. Introduce using cameras for the following session – how you might document the neighbourhood. Remember, if there are people in your photographs, you must ask permission first before using them. – 10 minutes
7. Demonstrate how to use the clipboard maps and how they should document the routes they will take next week. – 5 minutes
Summary
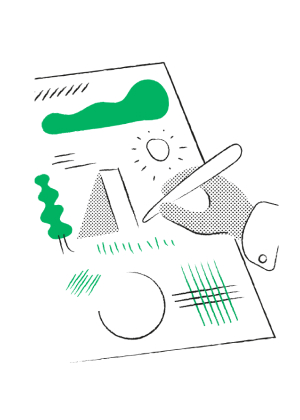
In this session, we explore and document the neighbourhood by walking.
Equipment
Printed concept diagrams on clip-boards, pens and cameras.
Preparation
• Parental and necessary school consent forms and sign-offs.
• Organise and confirm acceptable number of facilitators per group of children. Additional volunteers may be necessary.
• Define responsibilities of children on the way and during the work. Photographer, note-taker, observer etc…
• Teachers may want to go and visit the place prior to the activity. You could do a test run with the other facilitators, to make sure you have identified any dangers and mitigated any risks prior to the exercise.
1. Walk from your school to the neighbourhood. Determine a meeting point and a time by which to return. – 15 minutes
2. Get into your groups and make sure everyone is accounted for and your facilitators are with you at all times. – 10 minutes
3. Walk slowly around your neighbourhood, while documenting your route, taking photographs in small pre-prepared groups. Share roles, everyone should have a turn at taking photographs and taking notes. – 60 minutes
4. What is being made in your neighbourhood? Walk with your group to identify crafts and fabrication happening in the neighbourhood. Help the children identify things being made that they might not have noticed.
5. What are people doing?
6. What do you like or dislike?
7. Try to take different routes from the other groups, so that there is a wide area that is documented in your concept diagrams.
8. Meet back at the meeting point at the specified time. Have a snack and a break! – 15 minutes
9. Take a group photo near a neighbourhood landmark. – 5 minutes
10. Walk back to the school with the rest of the class and facilitators, making sure no one has been left behind. – 15 minutes
Summary
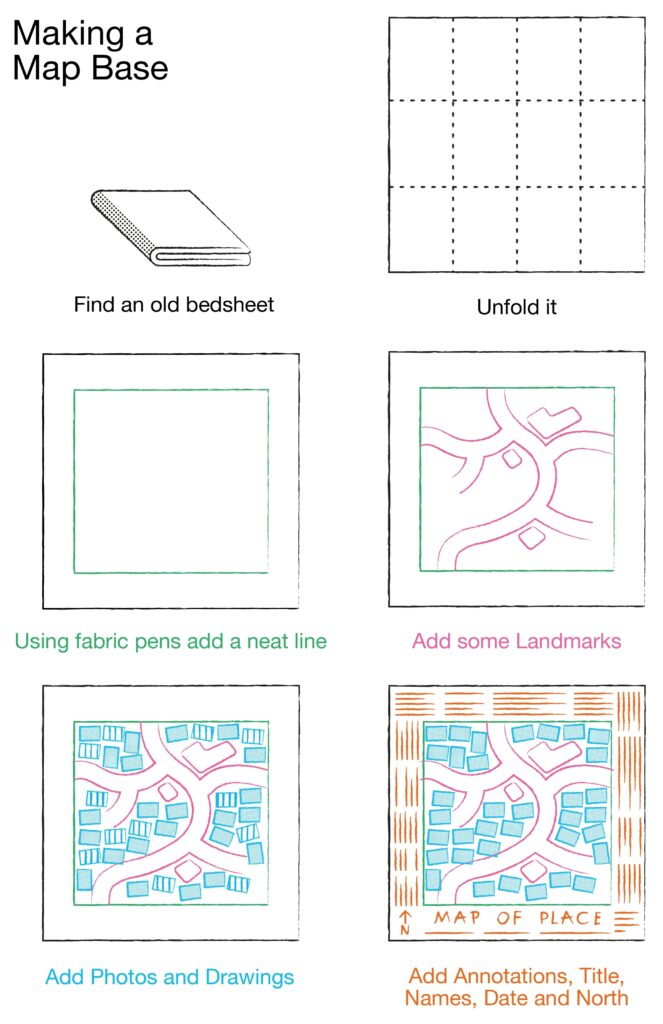
In these sessions, we make a map of the neighbourhood together, using printed photographs, annotation and drawings.
Equipment
Large white (bed)sheet, completed concept diagrams, (fabric) markers, printed photos from walkabout
Preparation
• Prepare the base-map. Show: landmarks, main streets, any green spaces, recognisable elements and spaces.
• Print the photographs. and split evenly into the number of groups.
1. In the classroom on the pre-prepared map base, group by group, identify your walkabout routes from memory, they can interlink. Where did you go and what did you see? – 10 minutes
2. Facilitate simultaneously the following activities: – 40 minutes
• Place your printed photographs along your routes. You can glue these in place when you are happy with their position.
• Write down/illustrate your field notes from your concept map.
• Locate and represent the different activities you identified in your area. What were people doing? Which spaces were they using and how?
• You can draw things you feel are missing from your notes and photographs.
• You can use annotation to add information too.
• Finish composing your map. Have you included everything you noted on your walkabout? Is there a north sign? What is the name of the map? Are your names on it? What about the date?
3. Mapping Discussion in final session: What can we learn from this map of the neighbourhood? What do we like about it? What is our favorite part of it? – 20 minutes
Summary
In this session, we document the map photographically, so that we can refer to it in the future and share it digitally.
Equipment
A good digital camera, a tripod, good/even lighting (may need to hire these)
Preparation
• Source the equipment and test that it works.
• Allocate a large wall on which to hang the map, or set up an alternative.
• Ascertain with the school faculty that the class can spend a session near the wall, if it is not in the classroom.
1. Set up the map so it is flat and equally lit. You might need to source lighting for this. – 20 minutes
2. Document your map carefully by taking photographs. – 30 minutes • Photographs should be of the whole map, high resolution. Can you see the detail of the map if you zoom in? • Everyone can have a go at taking a photograph with the camera, using the tripod. • Take photographs of details too – drawings, photo-collages etc… • What are the most interesting areas? Why?
3. Download the images onto a computer. Check that they are of good quality. – 5 minutes
4. Put the images in the project folder. – 5 minutes
Summary
These sessions are optional – they may be conducted with or without the schoolchildren, depending on availability and desire. This activity aims to develop a crafted translation of the neighbourhood map, working with a chosen craftsperson/craftspeople to create an artefact.
Equipment
The neighbourhood map, funding to commission a craftsperson.
Preparation
• Identify local crafts/ craftspeople/makers who could translate the neighbourhood map
• Prepare the map for sharing either digitally or in person.
1. Recreate the map with local crafts and/or craftspeople.
2. Choose a local maker who would like to be commissioned to translate the map in their material and method of choice.
3. This can be done with school children if they would like to and the school allows.
Summary
In this session, we identify the neighbourhood we will focus on for the duration of the project.
Equipment
Materials with which to hang the fabric map might include: a long bamboo stick, some rope, hooks and nails, a needle and some strong thread.
Preparation
• Liaise with school for exhibition permissions and fire safety etc.
1. Display the map(s) somewhere public. They can be hung vertically or shown flat on the ground, depending on their material. – 30 minutes
2. You may need to make a frame – depending on school space. – 10 minutes
3. Facilitate developing a presentation in groups. Help the pupils evaluate their own presentations. – 20 minutes
4. Organise a time to present the map to the rest of the school.
Enquire and Discuss
Summary
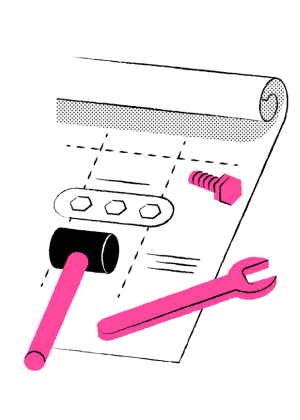
In this session, we determine what materials and crafts are available to us to use in our designs. by brainstorming the crafts seen and documented during the Walkabout project, to create a ‘palette’ of design materials and fabricators.
Equipment
Large sheets of paper for brainstorming (1x per group) and pens, printed photographs from previous session showing crafts, map should be accessible.
Preparation
• Make a list of the crafts you know about already. These can be used as prompts during the session.
• Re-visit the neighbourhood to see if there are any that were missed. Take any additional photos that are necessary.
1. Recollect the walkabout session and what you observed being made. Who was making what? How? With what? – 15 minutes
2. Each group can look through their notes and photographs from the walkabout, and look at the map, to see what was being made. Each group makes a list of what they found. – 15 minutes
3. Make a combined list of things that were being made after each group presents what they found on the blackboard. – 15 minutes
4. This will be your material/ craft palette for the rest of the project. Discuss the most interesting materials that could be used in design projects? Think about waste and sustainability too. – 15 minutes
Summary
In this session we determine the design themes for the continuation of the project. Equipment: Bring the neighbourhood map back into the classroom, if it isn’t already there. 1x A4 sheet of paper for each student.
Preparation
• Make a list of the crafts you know about already. These can be used as prompts during the session.
• Re-visit the neighbourhood to see if there are any that were missed. Take any additional photos that are necessary.
1. Quick Recall: Think back to your first walkabout – what did you like or dislike, what would you like to change? – 10 minutes
2. Look at your neighbourhood map for clues and reminders. In groups, help the children think about what they saw and felt during their walkabout. Go around the room, and everyone can have a chance to say a like or a dislike. – 10 minutes
3. Write all the themes on the board and hold a vote for project themes. – 10 minutes
4. Pick the most popular 4 or 5 themes. – 10 minutes
5. Make equal groups of children for each theme, and identify a facilitator for each group. These themes and groups will remain for the rest of the project – to design, make, present and assess the neighbourhood interventions. – 15 minutes
Summary:
In this session we prepare a questionnaire that we will use to interview the neighbourhood inhabitants, in relation to our chosen design themes.
Equipment:
Large sheets of paper and pens.
Preparation:
• Organise the next outdoor session with school faculty.
• Parental approval for field trip.
1. Introduce interview ethics. For this you can do a presentation on the do’s and dont’s of interviewing. You can include consent for audio, video and photography. And how to make an information sheet for the research project. – 20 minutes
2. In your theme groups, think of questions you would like to ask the neighbourhood residents. Do they think there is an issue? Have they already resolved it somehow? Do they know someone who has? What did they do? – 20 minutes
3. Once you have made a list of questions, you can do a mock interview. Take turns at being journalists: who asks the questions and who answers? Who will take notes? Will you do audio recordings? – 20 minutes
4. Prepare the students for the next session, interviewing in the neighbourhood.
Summary:
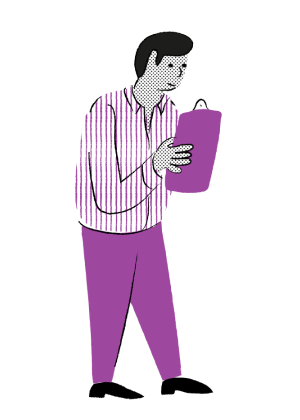
In this session we find out what the community thinks about the chosen design themes.
Equipment:
Cameras (optional), audio recorders, clipboards and pens with preprepared questions printed on A4 sheets.
Preparation:
• Clipboards with printed questions
• Parental approval for all students
1. Walk into the neighbourhood in your groups. Identify the meeting point. – 10 minutes
2. Walk around and interview residents using you pre-prepared questionnaires. – 50 minutes
3. Remember to think about ethics and obtain consent for all communication first. Make sure you aren’t making anyone feel uncomfortable.
4. You can record conversations using phones (following consent), and take notes using pens and clipboards.
5. Meet at the designated point and head back to the classroom. – 10 minutes
6. Debrief – what was expected? What was surprising? – 10 minutes
7. Collate the information ready for use in the next sessions. – 10 minutes
Design and Draw
Summary:
The groups will have already chosen their theme, so this session will focus on a design concept, and drawing a sketch individually.
Equipment:
A3 sheets for all children. Different types of drawing materials – pens, pastels, pencils, coloured and black.
Preparation:
• Put list of crafts and issues on blackboard.
• Prepare A4 sheets with the lists, for each group.
1. Brainstorm designs ideas for the design themes in preprepared groups. This can be done on the computer/ tablets if available. – 15 minutes
4. Encourage creative thinking – what material to use for each issue.
5. Sketch your design on a sheet of paper, using whichever drawing equipment you like. – 30 minutes
6. Present your sketch to the rest of your group. – 5 minutes
Summary:
This session aims to demonstrate and facilitate the development of detailed design drawings with the class.
Equipment:
Examples of design drawings, in different styles. A2 sheets of paper, rulers, pens.
Preparation:
• Print out/make a presentation of different design drawing methods: plan, section, elevation, axonometric, annotated, measured, scale…
• Hand out the sketches from the previous session.
1. Explain the different types of design drawings that exist: plan, section elevation, axonometric, annotated… – 15 minutes
2. In your groups, redraw more detailed, annotated drawings individually.
• Think about how this drawing needs to communicate with the craftspeople who will make your design. – 45 minutes
3. Help the children each develop a more detailed drawing of their concept design. Are their materials working?
• Facilitate adding detail to drawings. Measurements, annotations, colours…- 40 minutes
4. Present designs to the class when drawings are finished. – 20 minutes
Summary
During this session a design will be chosen or combined from multiple designs within a group, for commissioning to the fabricators.
Equipment
Large/A1 sheets for each group and pens.
Preparation
• Print out/make a presentation of different design drawing methods: plan, section, elevation, axonometric, annotated, measured, scale…
• Hand out the sketches from the previous session.
1. Facilitate a group combination of designs, so that every student has some piece of their design in the final proposal.
• The combined design should be drawn collectively on the large sheet of paper.
• Help any children that need additional support with their work. – 45 minutes
2. Each group presents their combined design to the rest of the class, with a Q and A relating to how it will be made and by whom.
• Is the design drawing ready to be looked at by a fabricator? – 15 minutes
Commission and Make
Summary:
During this session the groups will be able to discuss their designs with the fabricators.
Equipment:
Prepared design drawings from the previous session.
Preparation:
• Invite the Craftspeople to the school, or meet them in a community space.
• Organise remuneration for this time.
• Make sure consent forms have been signed and the school have cleared the makers as visitors.
• Have all the design drawings ready for use during discussions.
• Set up tables for the craftspeople to sit at and discuss designs with the groups.
1. Invite each maker to present themselves and what they do. – 20 minutes
2. Each maker can set up at a table in the classroom.
3. Ask the students to present their groups and their design ideas. Each group can visit the maker(s) that they want to work with, to discuss their design, and work through any amendments/issues with the fabricator. – 40 minutes
4. Make sure both the fabricators and the pupilsare happy to commence fabrication of the prototypes.
Summary:
During this session the students will assess the prototypes fabricated by the neighbourhood makers.
Equipment:
Prototypes, large sheet of paper and pens, per group.
Preparation:
• Approximately 1 month fabrication time: Facilitators document the process photographically.
• Presentation of fabrication process
• Organise transport, pick up delivery and carrying to classroom.
• Make sure the objects are not dangerous in any way (sharp, breakable etc).
1. Bring in the fabricated objects to assess them in the classroom. – 10 minutes
2. Facilitate an assessment by brainstorming with the children group by group.
• What needs to be changed, added, remade? – 30 minutes
3. Present assessments to the rest of the class. – 20 minutes
4. Organise any changes/ additions necessary before presentation in the neighbourhood.
Summary:
During this session the students will assess the prototypes fabricated by the neighbourhood makers.
Equipment:
Final prototypes.
Preparation:
• Prepare consents for final outing for presentations the following week.
• Invite parents and school to the event.
1. Bring final objects into the classroom.
2. In groups, the children can develop their presentations to the neighbourhood. Each facilitator helps their group prepare their public presentation. – 30 minutes
• Rehearse Q and A. Use role play with the objects. (3-minute presentations)
• Do there need to be invitations? A banner? How to invite the community? I so how should these be made?
3. Present to the class. – 20 minutes
4. Think about where you would like to do your presentation in the neighbourhood.
5. What order should the groups present in? – 10 minutes
6. Organise any changes/ additions necessary before presentation in the neighbourhood.
Present and Share
Summary:
During this session the students will present their designs in the neighbourhood to the public. Equipment: Final prototypes, and any banners/leaflets etc…
Preparation:
• Make sure parental consents have been completed, and faculty has been notified/ approved.
• Ensure there are enough facilitators to accompany the groups, and enrol volunteers if necessary.
• Ensure prototypes can be transported easily.
• Could press be called?
• Organise video documentation and photography for the event.
• Make sure you know what order the groups will present in, so you can plan the route. 1. Meet with your group and travel to the neighbourhood. – 15 minutes
2. Present group by group to the public, along the route previously agreed. – 15 minutes /group
3. Engage the public to get as many people to attend as possible.
4. Q and A following each presentation.
5. Photograph each group after their presentation.
6. Document the presentation day by asking community members what they think of the prototypes, and students what they learnt from this project.
7. Meet at the meeting point, and travel back to school. – 15 minutes
Summary:
During this session the students can reflect on the entirety of the project, and what happens next.
Equipment:
A4 sheets of paper each, snacks.
Preparation:
You could think of a space within which an exhibition could be held. Celebration and snacks!
1. Classroom session to discuss the presentations and Q and A’s.
2. What questions did the public have? – 10 minutes
3. How do you think your presentations went? What went well? What went not so well? – 10 minutes
4. On the feedback sheet, answer the following questions:
• What did you like best about the whole project?
• What didn’t you like about the whole project?
• What do you feel you learned?
• Any other comments? – 20 minutes
5. Celebration and congratulations on amazing efforts all round! – 20 minutes
Test and Evaluate
Summary:
During this session the students plan the installation of prototypes, make an evaluation plan and organise data collection.
Equipment:
The prototypes. Large sheets of paper, pens for each group. Printed maps of the area, or use of Google maps on computers.
Preparation:
• Do you need any approvals from public authorities?
• Can community groups on site help with this work? Could they be remunerated? How could this be funded?
1. In groups, brainstorm different possible locations for prototype installation. Pick the favourite location. Will the prototypes stay out overnight? If not how will they be looked after? 20 minutes 2. How will the prototype be evaluated? Each group decides on the parameters for assessment, and makes an evaluation plan. How long will the evaluation take place for? Who will carry out the evaluation? How will the information be kept safely and collected? Will you use photographs, note-taking, interviews… – 20 minutes
3. Each group presents their location and evaluation plan to the rest of the class. – 10 minutes
4. Organise the next session for installation of the prototypes. Are evaluation plans and methods needed for members of the community who may want to help? – 10 minutes
Summary:
During this session the students install their interventions for evaluation and organise data collection.
Equipment:
The prototypes and transport to site. Any additional materials to make using them safe for the all involved.
Preparation:
• Do you need any approvals from public authorities/ neighbourhood leaders?
• Make sure the prototypes can be carried and installed safely.
• Ensure to carry out school-related approvals and parental consents.
• Meet with community groups on site if helping with this work.
1. Meet or travel together to the site, transporting the prototypes for each group. – 15 minutes
2. Facilitate each group’s installation of their prototype in the planned location. – 40 minutes
3. Check safety and usability. – 20 minutes
4. Test the evaluation plan and methods. Discuss plans with external evaluators and neighbours. Ensure all parties are happy with their tasks, and know how long the exercise will take (1 day, 2 days, a week?). – 10 minutes
5. Document photographically the prototype in its test location prior to testing. – 10 minutes
6. Distribute evaluation data collection materials to evaluators. – 10 minutes
Summary:
During this session the students will evaluate their prototypes and collect data.
Equipment:
The prototypes. Evaluation forms/materials. Cameras?
Preparation:
• Create an evaluation form that can be filled out be whoever is evaluating the prototype on site. • Print the appropriate number of forms. If photography is being used to evaluate, share ethics guidance on photographing faces and need for consent.
• Prepare a base spreadsheet to collect data from evaluation.
1. Go to site. Each group can collect their prototype and collect all the evaluation forms/materials distributed in the planning session. – 50 minutes
2. Make sure the prototype has been well documented in its site location.
3. Photograph the prototype after testing in its on-site location.
4. Back in the classroom, each group can begin to analyse the data collected about their prototype. What were the main comments from users?
5. What worked well?
6. What worked less well?
7. Collate the data in a spreadsheet so that each group can search for themes and patterns in their data.
8. What themes can each group find?
9. How does this affect the design of the intervention?
10. Start to put all the findings into a spreadsheet so that you can analyse the outcomes. – 50 minutes
Summary:
During this session the students examine the data collected, and prepare findings from their research and next steps in terms of their prototype design.
Equipment:
Evaluation data from evaluation and session. Computers for spreadsheet analysis.
Preparation:
• Store the prototypes or leave them in the neighbourhood if the public want to use them and the relevant authorities allow it.
1. In the usual groups, assess the data collected for each prototype, in the forms/ photographs, that has been put into a spreadsheet.
2. Can you see any comments that repeat often? Can you count how many times this has been said? – 20 minutes
3. Make a pie chart based on the findings from your evaluation. What are the conclusions? What was logged most, or least? – 10 minutes
4. Based on your findings, make a statement about your prototype design. What should happen next? Is it ready for use or does it need some design tweaks?
5. If it’s ready, who do you want to present it to – could a fabricator make your prototype and sell it? Could it become a business?
6. Present your findings and your future plan to the rest of the class. – 30 minutes